|
本帖最后由 Traxxas 于 17-5-25 17:15 编辑 视频原创发布者BY TRAXXAS 翻译者BY TRAXXAS中国总代理电波模型 作为新手的您,会不会因为换一套传动齿轮而手忙脚乱呢,希望这个视频能帮到您! 以下是中国TRAXXAS总代理电波模型帮做出的翻译视频, 因模型涉及到专业术语,如若翻译有误,欢迎指正! 
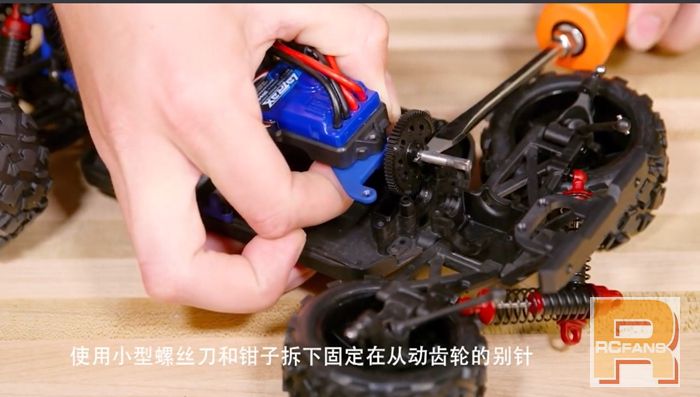
以英文原档为准,请参考: LaTrax – How to replace a Spur Gear Today we will show you how to replace a spur gear on your low TRAXXAS vehicle.You will need a small Phillips head screwdriver and a pair of needlenose pliers. An electric screwdriver is ok if used with a low torque setting, get a replacement gear for your vehicle and followed these steps.First remove the body and battery from the vehicle, remove the four screws behind the speed control, note that the screws are different sizes and remember where they go. Very gently lift up the upper chassis but don’t pull directly on the electronic speed control or wires. Remove the gear cover, use pliers to disconnect the rear camber links. Pull out on the two rear wheels to disconnect the drive shafts. Now use the pliers to disconnect the two rear shocks. Remove the two screws from the rear bumper. Now remove the four screws from the rear place and then remove the two screws from the front of the rear differential case.Remove the rear plate and differential and set it aside, being careful not to lose any parts.Remove the bearing cover, gently lift up again on the upper chassis and remove the pinion gear and bearing or bushings. Use a small screwdriver and pliers to remove the pin that holds the spur gear in place. Now remove the gear, install the replacement gear and reassemble in reverse order. Put in the pin. Replace the big bearing or bushing first, and then the smaller one. Replace the pinion gear and differential. Replace the bearing brace and rear plate. Put the two screws back into the front of the differential case. Replace the screws in the rear bumper. Replace the four screws in the rear plate. Push the two rear drive shafts back into place and reattach the camber links. Use the pliers to reattach the two rear shocks. Lift up on the top chassis and put the gear cover back in place. Now replace the final four screws you removed earlier. The two longer ones go into the sides of the top chassis. Put one shorter screw behind the ESC and the other in the gear cover. Now you are ready to go. 请支持行货电子设备,电波模型总代理承担非人为损件保修一年,直接换新! 如果您想了解更多关于我们品牌的资讯, 请咨询电波模型淘宝店旺旺客服: http://rcmart.taobao.com/?spm=a1z10.1-c.0.0.U0xSpE 微信扫一扫,可得知最新资讯! 

或联系我们 QQ :2713236907/270570161 手机:13712111381 王小姐 |
广告投放|联系我们|手机|投稿|Archiver|About us|Advertise|遥控迷模型网|RCFans ( 粤ICP备10210518号-1 )
版权所有 RCFans.com © 2003-2016